Port Spy
Use / User Manual
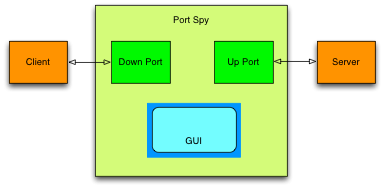
Port Spy is easy to use, just remember that it should go in between the client and server of the connection which data you want to observe.
In a picture, it looks as follows:
##Local Server:
Assuming the server runs on the same computer as Port Spy and that the server listens on port 2042:
- Configure the server to listen on a different port, say 2043.
- Start Port Spy
- Create a new Port Spy window (⌘-N)
- Enter “2042” in the ‘down port’ field (the port the client needs to connect to)
- Enter “2043” in the ‘up port’ field (the port the server listens on)
- Click the ‘start’ button.
Now start the client and let it connect -as before- to port 2042. Initiate a transmission and observe the results:
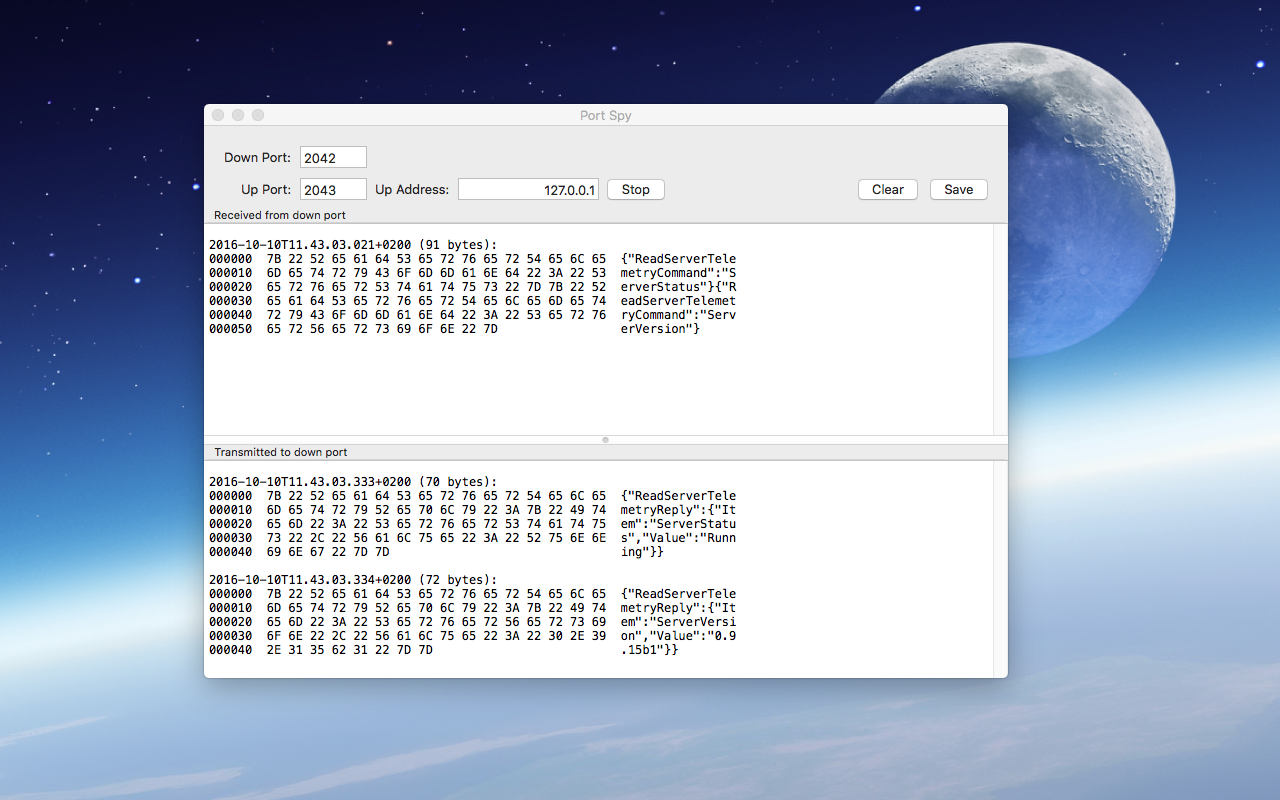
In the above example the client may run on the same computer or not.
Remote Server:
If on the other hand the client runs on the same computer and the server runs on a remote computer the setup is a little different. Now it is not possible to change the port on which the server listens. But Port Spy can be used as a local “proxy” for the remote server:
- Start Port Spy.
- Enter a free port number in the ‘down port’, say 2044.
- Enter the port number and address of the server, in the example below: port “80” on the server “balancingrock.nl”
- Start Port Spy
Now start the client and connect it to “localhost:2044” instead of “balancingrock:80” and observe the results:
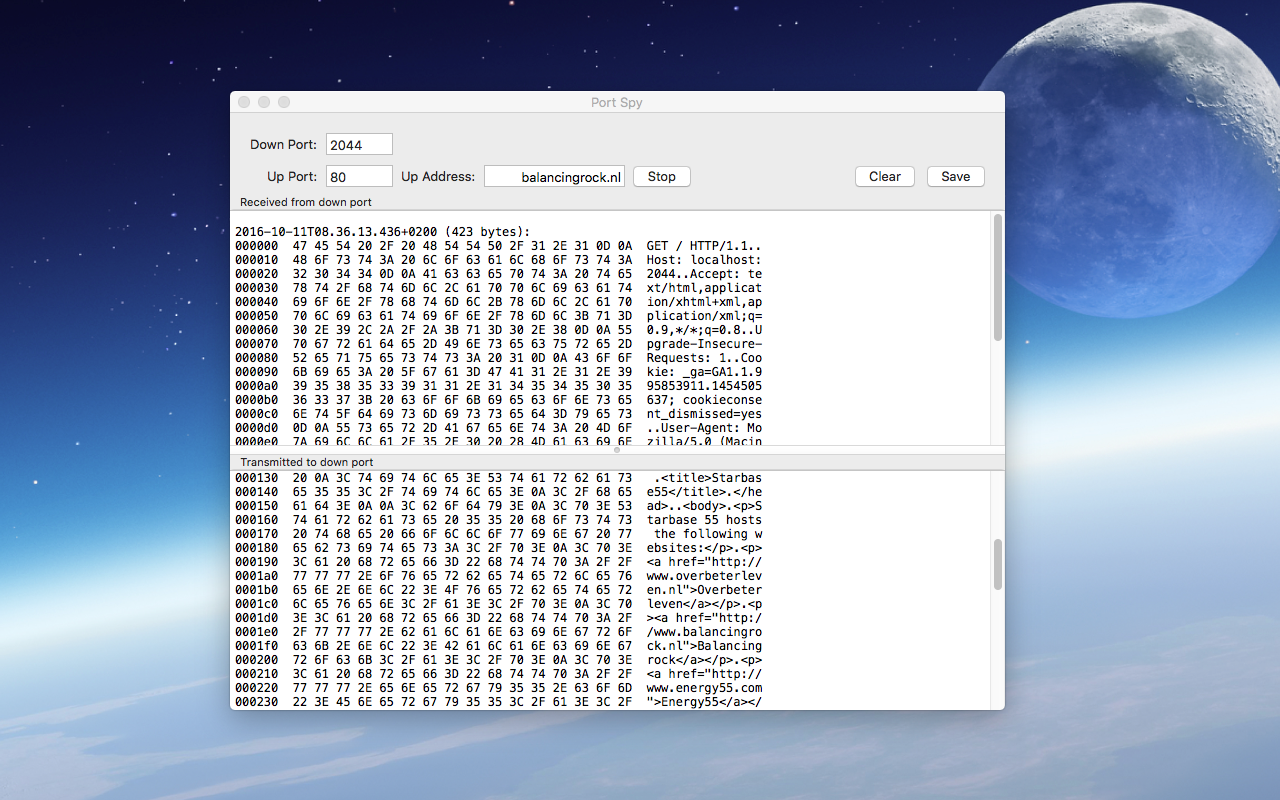
Caveat: In the above example a browser is used as a client. This creates an error since the URL must be specified as “localhost:2044”. But that means that the HTTP request contains “localhost” in its HOST field. The server at balancingrock.nl is expecting “balancingrock.nl” in the HOST field. Hence an error occurs. The error is of course visible in the byte stream, thus as an example this works fine.